This isn't a cooking blog, but it is a "whatever I want to write" blog; so when people asked me for my English Muffin recipe, I thought that this would be the easiest way to share it.
When the quarantimes hit (the season of Covidtide?) last March, people took on various baking and cooking projects. While I didn't hop on the sourdough bandwagon (even though sourdough has been on my list of things I want to learn), I did take on a couple of projects that I had been wanting to try and now had the time. Croissants. English Muffins. (Bagels are next on my list.)
A note about this recipe. My favourite English Muffins are sourdough, but they don't seem to be available in the grocery stores here in eastern Canada. As I mentioned above, I don't have a sourdough starter, but this recipe uses a pre-ferment to try and mimic the flavour and texture that I like. If you are used to English Muffins with a mild flavour and crumbly tender texture, this recipe may not be for you.
They take a bit of time (not active time, but waiting time) - if you scroll down to the bottom, I've included my usual timeline for making these.
Yield: 6
Ingredients
Pre-Ferment: 3/8 cup all-purpose flour
1/8 tsp active dry yeast
1/4 cup warm water
Muffins: 1/2 cup warm water
1/2 teaspoon active dry yeast
1 teaspoon salt
1 1/2 cups all-purpose flour
Directions
1. Mix the pre-ferment ingredients and beat until smooth. Cover the bowl and let it sit on the counter for ~12 hours. It will be bubbly and you will smell the fermentation at this time.
2. Begin to make the Muffins. In a larger bowl, add the water, sprinkle the yeast over it, and let it soften for 5 minutes. Add the salt and the pre-ferment and stir - you won't be able to get it into a smooth mixture, so don't waste your time trying - it will all come together when you add the flour.
3. Gradually stir in the flour - this is a fairly soft and wet dough. Knead for 5 minutes until it is smooth. You can add up to 2 tbsp of extra flour as you knead, but resist the urge to add more, as you want a very wet dough at the end. I find that the "slap it on the counter" method of kneading works better for wet doughs than the "flatten and fold" method of kneading. With just a couple of minutes of slapping it on the counter, you can feel the gluten bonds forming and the dough becoming smoother and less sticky without adding any extra flour. (If you aren't sure what I mean, here is a video of this technique - with this recipe, you will have less dough than in the video.)
4. Place the dough in a greased
bowl, cover, and put in the refrigerator to let it rise slowly for a
minimum of 12 hours (I usually leave it for 24 hours). It will have
doubled in size. (That is a giant air bubble bulging out of mine!)
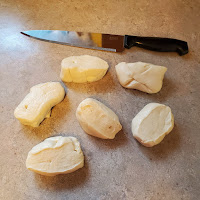
5. Divide the dough in 6 (popping any large air bubbles as necessary) - I usually use a kitchen scale to make sure that the pieces are equal.
6. Form the dough into tight balls, flatten them, and cover both sides in cornmeal. Place them on a cookie sheet cover with a tea towel, and let them proof on the counter for 2 hours.
7. Heat a cast iron frying pan over medium-low heat. Place 3 muffins in the pan and cover. Cook for 7 minutes, then flip. They should be lightly browned and a bit puffy - adjust your heat as necessary. Cook for another 7 minutes on the other side.
8. Cool on a rack, and repeat with the other 3 muffins.
9. In order to get the craggy look, make sure that you split them with a fork rather than slicing them with a knife. They toast well, and freeze well too. This last picture is from my lunch today - an English Muffin that I made last weekend, taken from the freezer and toasted.
Because these take some time, you need to plan ahead. Here is the schedule I usually follow:
Day 1 (evening) - mix the pre-ferment)
Day 2 (morning) - mix the muffin dough
Day 3 (morning) - shape the muffins
Day 3 (noon) - cook the muffins
Happy baking!


Thank you for sharing!
ReplyDelete